Change WooCommerce price and currency with a tiny plugin

I’ve tried many currency plugins for WooCommerce, but none of them worked well. Some of them were not compatible with coupons, WooCommerce Subscriptions or poorly coded, so I decided to write a tiny WordPress plugin to change the price and currency based on the billing country.

What it does?
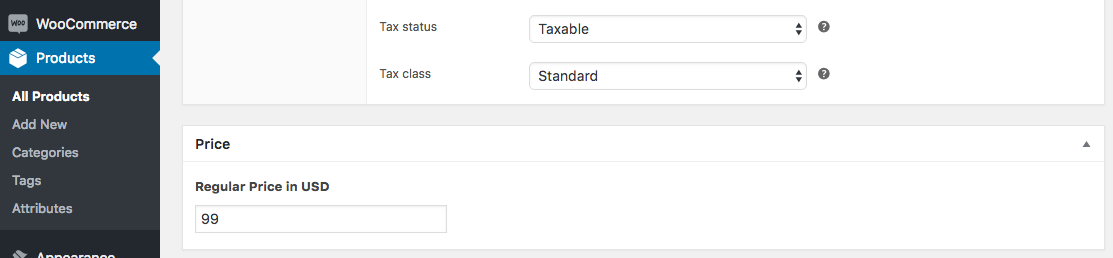
1. If the billing country is not “DE” (Germany), then it gets the price from a custom field “regular_price_usd”, which is created by ACF plugin.
2. If the billing country is not “DE” (Germany), then it changes the currency to USD.
3. If currency is USD, disables TAX calculation.

Can be easily adopted to use more countries and currencies. You can also implement GeoIP and change prices by IP location or browser language on the fly.

Price in USD for WooCommmerce
Price in USD after changing the currency

Simple AJAX posts filter by category and publish date for WordPress

The first thing you need to do is to write some HTML for category and publish date select box. This can be added to a custom template or your home page index.php file.

Now, when we have HTML ready, we also need to show some latest blog posts.

Create a file called content-post.php in template-parts directory. If this directory doesn’t exist, then create it. We’ll be showing the title of the post and linking to it.

Add this JavaScript code to your theme’s javascript file. This code filters out the posts by category and publish date under AJAX. The request is sent to ajax_filterposts_handler PHP function, then response is delivered by JavaScript (jQuery).

Finally, the PHP part. Add this to your functions.php file.

Hide Uncategorized category from WooCommerce pages

Couldn’t find any working snippet in Google, so I decided to write it myself. This snippet will hide the Uncategorized category from front-end.

Allow backorders for certain products in WooCommerce

Using this code snippet you can allow backorders for certain products.

Nginx and WordPress SEO by Yoast robots.txt 404 error message

I recently had an issue with robots.txt file and Google Search Console. It was showing a 404 error message. The problem was related to Nginx and Yoast SEO plugin. In my case, robots.txt is virtual and generated by Yoast SEO plugin. Nginx throws a 404 error because it can’t find the physical file, but then a request for robots.txt is detected by Yoast SEO plugin and the content is generated. However, Google bot stops at 404 error.

Basically, what you need to do is to add these lines to Nginx server blocks:

This means, Nginx will look for robots.txt through PHP and will not try to find a physical file.

How to add a custom field to WooCommerce checkout page

How to modify the WooCommerce API orders response?

How to modify the WordPress REST API posts response

The WordPress REST API is a great thing, but in most cases you need to extend it. For example, if you use Advanced Custom Fields and you need to get them via the API, then you need to modify the response. Here’s a quick example:

How to create a callback URL in WooCommerce

I was working on a payment gateway for WooCommerce and had to create a special URL that will then load the specified class method. Sometimes the information does not reach all parties e.g. if you close the browser and the status of the payment between the payment’s and merchant’s server remains unclear. The WooCommerce API allows you to create a callback URL.

Creating a callback URL

Calling a callback URL

Before WooCommerce 2.0, you could use:

Home

In WoCommerce 2.0+:
http://yoursite.com/wc-api/wc_gateway_my_gateway/

DevSlider – A simple responsive slider built for Developers

There were many times when client asked me to customize the current slider template and add new settings to the slider. There are many great sliders in WordPress plugins repository, but they are not extendable – you can’t add new settings to the slider and change the template or it’s very hard. This time I decided to spend a bit more time and create my own slider which you can extend easily.

It uses bxSlider jQuery library and a Custom Post Type for slides. bxSlider has many options and examples. You can filter out bxSlider options by using devslider_slider_js filter and change them.

How to add slider to your page?

Use [DevSlider] shortocde. Available options are: slidewidth (default: 0), minslides (default: 1), maxslides (default: 1), category (default: all or category slug).

How to change the slider template?

The template file of DevSlider contains the markup and template structure for the front-end. This template file can be found within the /devslider/inc/ directory.

You can edit this template in an upgrade safe way through overrides. Simply copy devslider-template.php to your theme folder.

How to add new settings?

There are two ways. You can use Advanced Custom Fields plugin or WordPress meta boxes.

If you are going to use ACF, then you need to tell that to DevSlider by using devslider_use_wp_meta_boxes filter.

If you are going to use WordPress metaboxes, then you need to add a new meta box by using devslider_slider_settings_metabox action hook. For example, I’ll add a new input field for slide text.

We also need to hook into devslider_save_slide action hook to save it.

Now in wp-content/themes/yourtheme/devslider-template.php you can use slide text. (If you don’t see this file in your theme, then you can .copy it from the plugin inc folder).

You are welcome to contribute to this slider on GitHub.

Available action hooks

  • devslider_loaded
  • before_devslider_init
  • after_devslider_init
  • devslider_enqueue_scripts
  • devslider_add_meta_boxes
  • devslider_slider_settings_metabox – available argument $post
  • devslider_save_slide – available argument $post_id

Available filters

  • devslider_slider_js – bxSlider JavaScript code
  • devslider_use_wp_meta_boxes – available argument bool – true or false